
I've spent the last month prepping, creating, and crafting for my friend Britany's baby shower.
I got together with some of her other friends to put on a Mustache Bash to welcome her little boy.
I wanted to share one of the decorations I made for the event:
DIY Paper Fans!

These are SO simple to make but they look awesome!
Here's what you'll need to make 1 large fan:
- 3- 12x12 pieces of paper (same design/print)
- glue gun
- fishing line (optional; for hanging from the ceiling)

1- Start with 3 pieces of 12x12 paper
2- Fold it "accordion style" in 1-inch increments
3 - Fold the entire paper (you may end of with a slightly short or longer piece at the end; it's ok!)
4 - Bring the each end together to meet in the middle.

5 - Crease the center fold well.
6 - Follow steps 1-5 for the remaining 2 papers.
7 - Hold each "fan" by one side so the inner folds are visible.
8 - Place a line of hot glue along the edge and center crease.
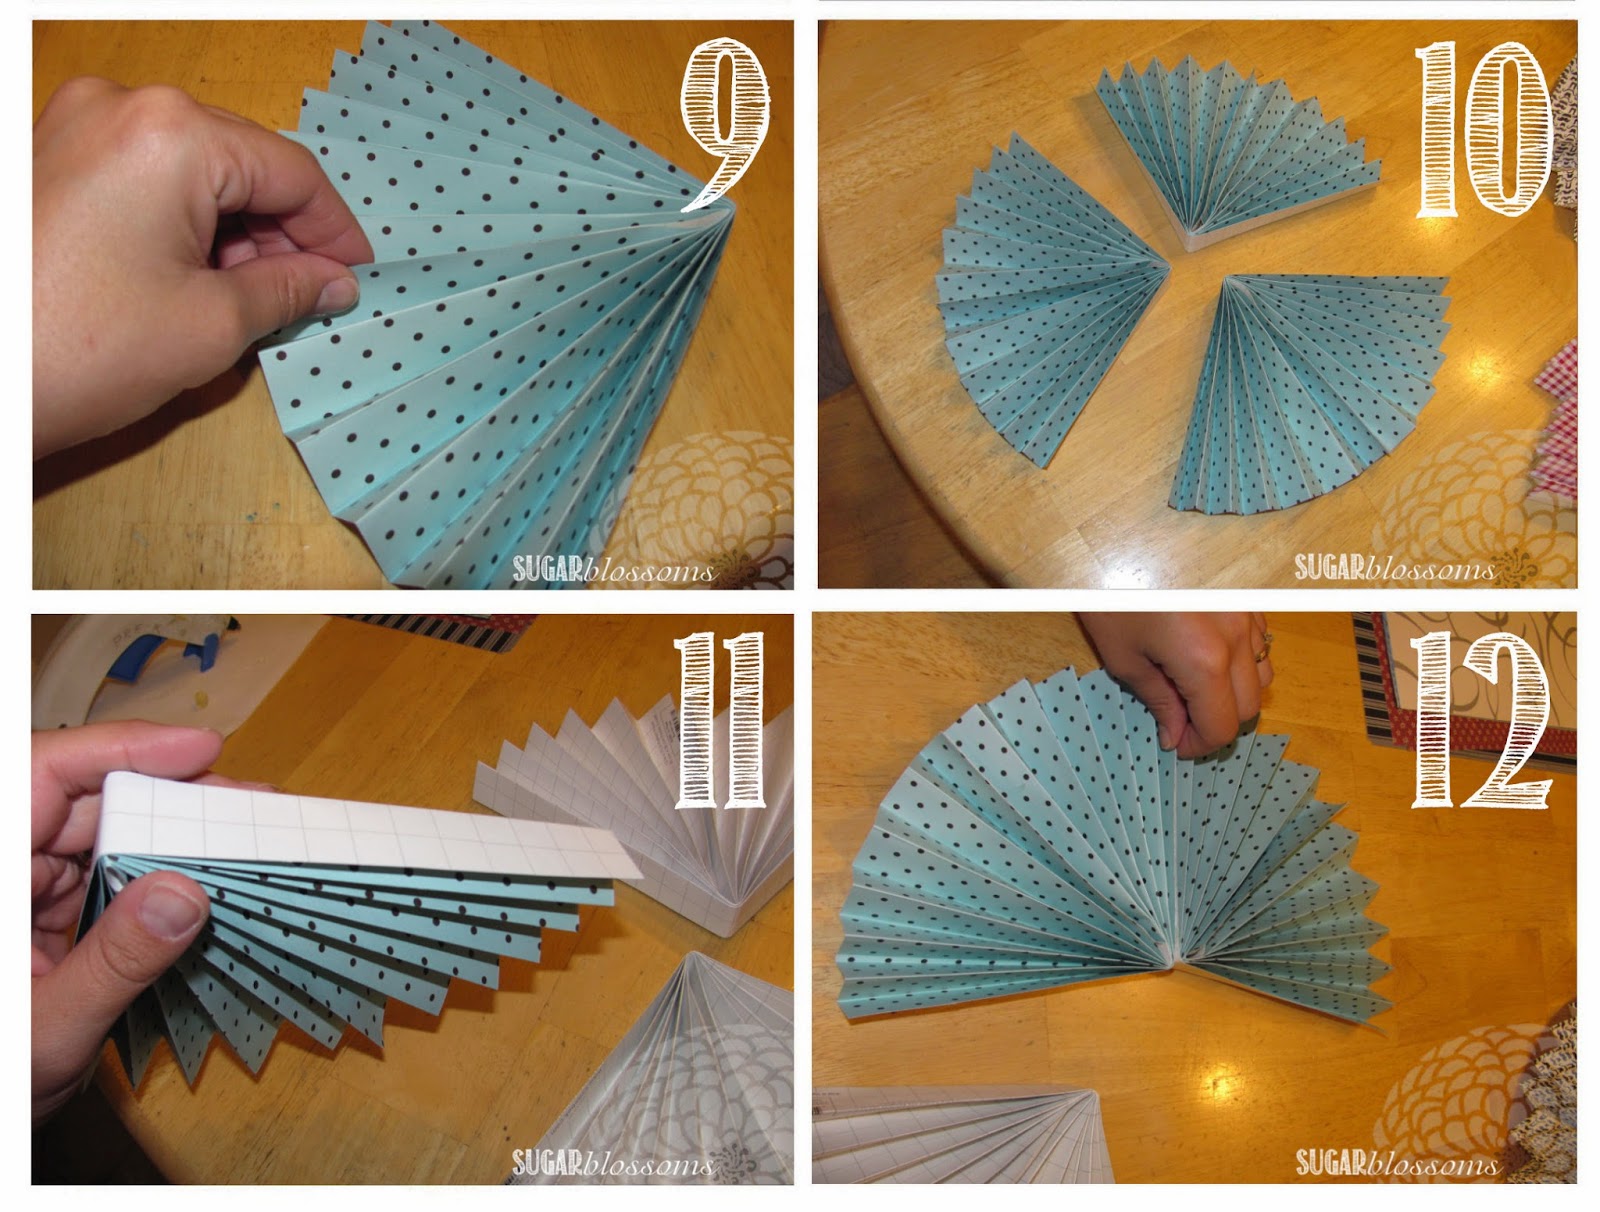
9 - Pinch "fan" closed to adhere glue to both sides.
10 - Follow steps 7-9 for remaining "fans".
11- On outer edge of one "fan", pipe a line of glue along top and lower crease.
12 - Attach glued side to outer edge of another "fan".

13 - Pipe glue along outer edge of last "fan". Attach it to one side of previously joined "fans".
14 - Pipe another line of glue along top edge and down center crease.
15 - Pinch together to secure.
16 - VIOLA!!
For a small fan, you'll need:
- 1 piece of 12x12 paper
- hot glue
- fishing line (optional; for hanging from the ceiling)

Follow the same steps as the large fan, but start with 1/2 inch folds (instead of 1-inch folds). You'll need all four small "fans" to complete this one (vs. 3 "fans" for the large one).

See how easy that was?!
I didn't use fishing line on these because we attached them to a backdrop instead of hanging from the ceiling.
Here's a little peek at where we used ours:

How would YOU decorate with these?

No comments:
Post a Comment